Main focus
Configure Zebra DataWedge so Mobile Inventory receives barcode scans from your Zebra device correctly.
This guide explains how to configure DataWedge so barcode scanning works correctly with Mobile Inventory. DataWedge lets you control scanner behavior and the method used to send barcode data.
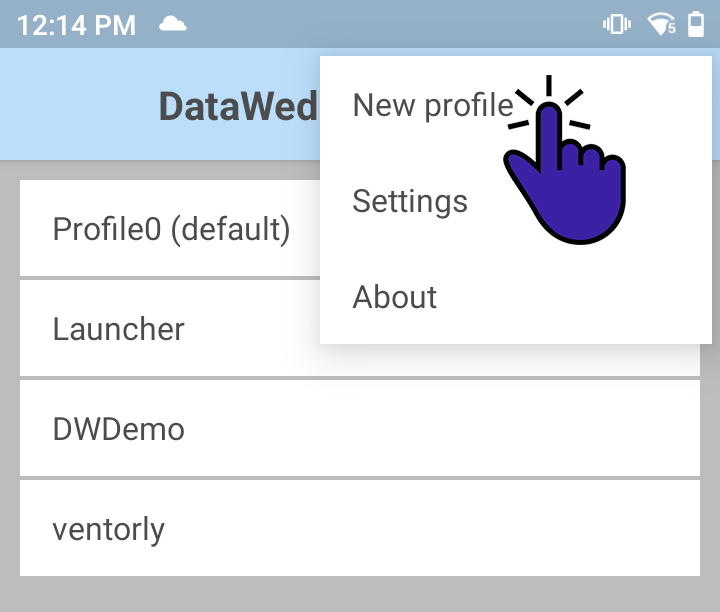
Step 1: Create a new profile
Open the DataWedge app on your Zebra device. Create a new profile that defines how the scanner should behave inside Mobile Inventory. This profile stores the settings used for barcode scanning in the app.
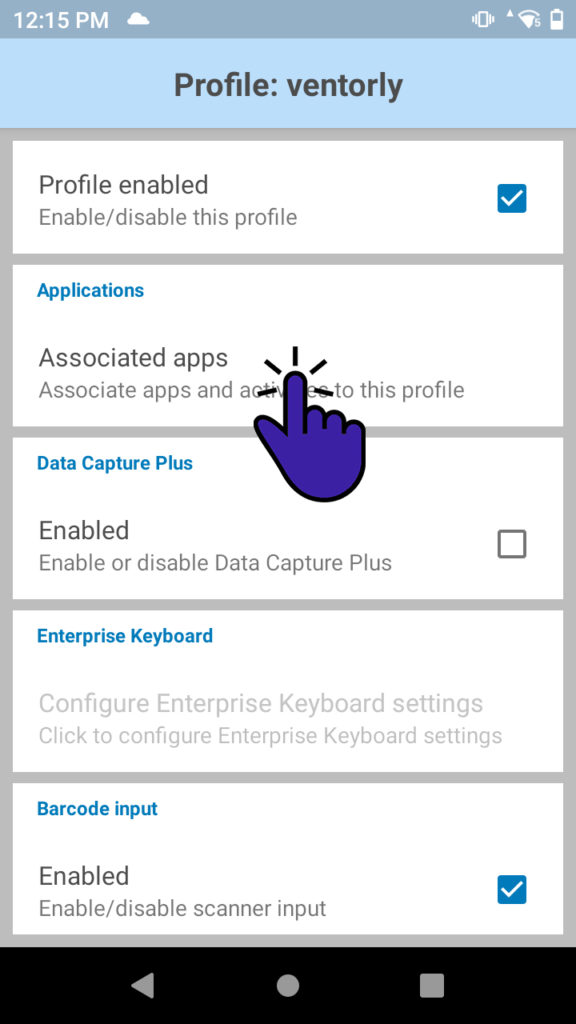
Step 2: Associate the Mobile Inventory app
In Associated Applications, specify which app should use this DataWedge profile. Select the Mobile Inventory package name: ro.bino.inventory.*.
The asterisk * wildcard makes the configuration apply to all Mobile Inventory app versions and variants.

Choose a data transmission method
DataWedge can send barcode data to your app in two different ways. Pick the option that best matches your workflow and technical requirements.
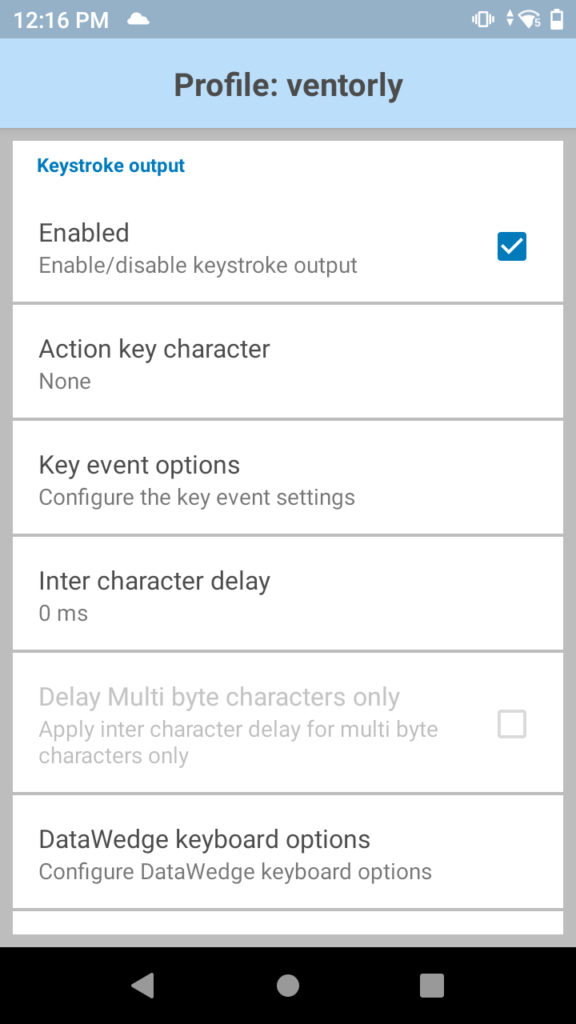
Option 1: Keystroke Output
This method simulates keyboard input. The scanned barcode is sent as if it were typed, so it appears in the active text field inside Mobile Inventory.
To configure it, enable Keystroke Output. This option is useful when you want scanned data to fill input fields automatically.
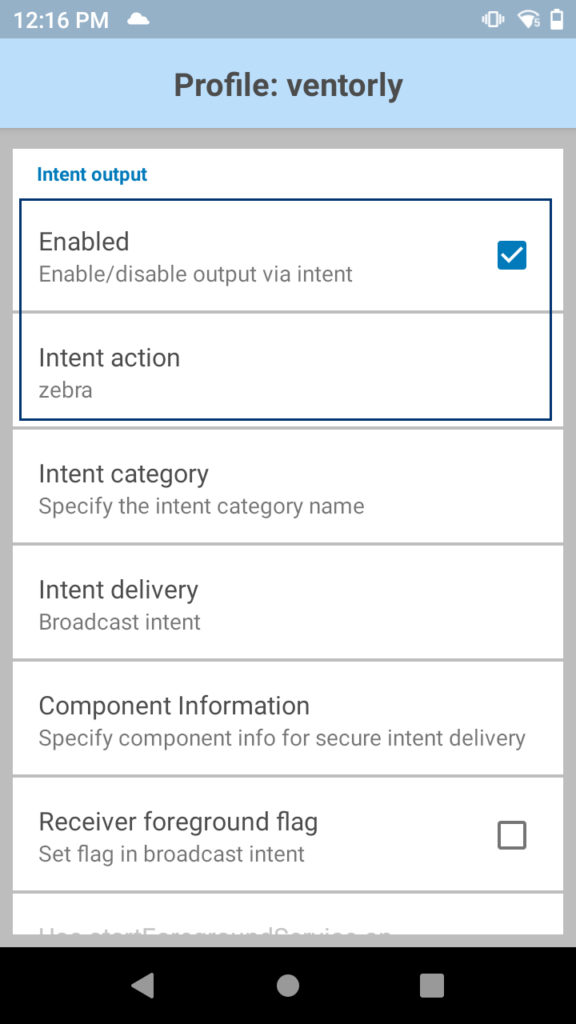
Option 2: Intent Output
This method uses Android intents to send barcode data directly to Mobile Inventory. It gives the app more control over how scanned data is handled.
To configure it, enable Intent Output and set Intent Action to zebra. This creates a direct communication channel between DataWedge and Mobile Inventory.
Configuration complete
After you configure your preferred transmission method, the DataWedge profile is ready. Mobile Inventory will receive barcode data according to the settings you selected.